
Building an Automatic Solar Tracker With Arduino UNO 8 Steps Instructables
Step 1: What You Will Need for a Solar Tracker Here is a list of the items which you need in order to complete this project. If you are looking to make a dual axis tracking stand then you will need to double up on the servos, LDRs and resistors. An Arduino (Uno used here) - Buy Here Single Axis Tracking Stand (Brief DIY Design Shown In Step 6)
Arduino Solar Tracker Hackster.io
Solar panel Arduino Uno LDR's X 2 (Light Dependent Resistor) 10K resistors X 2 Battery (6 to 12V) How does a single axis solar tracker work? In this project, LDR's are working as light detectors. Before we go into detail, we will have to understand how the LDR's work.
Arduino based Sun Tracking Solar Panel Arduino Project Hub
Detecting the position of the Sun: We measure the intensity of light with LDRs using Arduino and compare the intensity of light falling on both LDRs. The LDRs are placed on the edges of the solar panel as shown in the figure below. Based on the intensity of light on the LDR, we give the signal to the servo motor to cause the movement.
Sun Tracking Solar Panel Using Arduino Project Step By Step Guide My XXX Hot Girl
Welcome to our illuminating tutorial on building a solar tracker for solar panels using Arduino UNO! If you're keen to harness the power of the sun efficient.
Solar Tracker Circuit Diagram Wiring Diagram and Structur
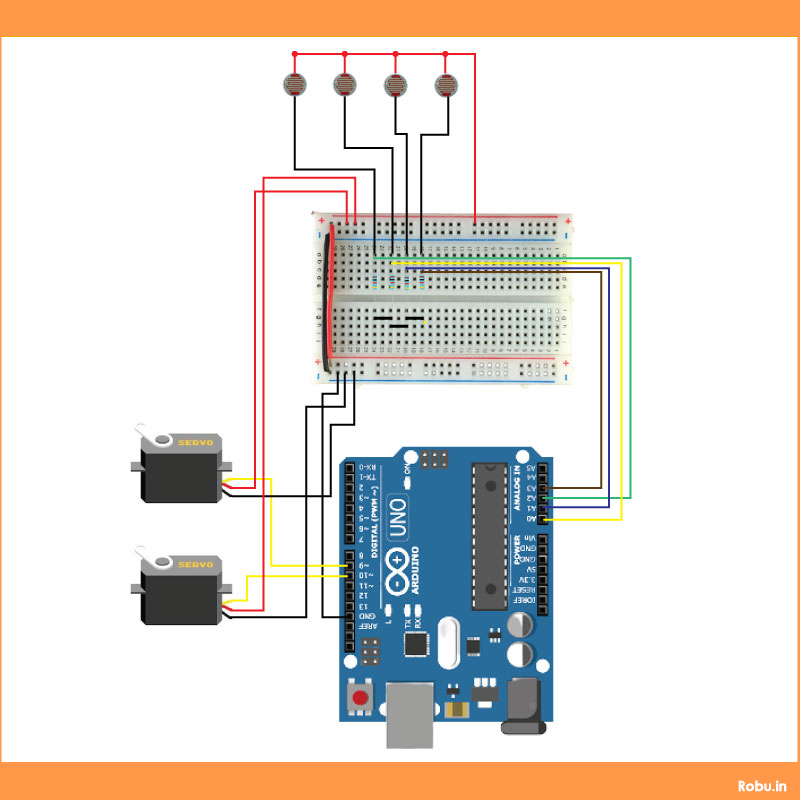
The circuit diagram for the Arduino Based Solar Tracker Using LDR & Servo Motor is given below. Assemble the circuit as shown below. Project Design & Consideration: Fix the cardboard at the top of the Servo Motor that will face towards the SUN and rotate: Put a Blockage between the 2 LDR by keeping it at distance of at least 5 cm.
Arduino based Sun Tracking Solar Panel Arduino Project Hub
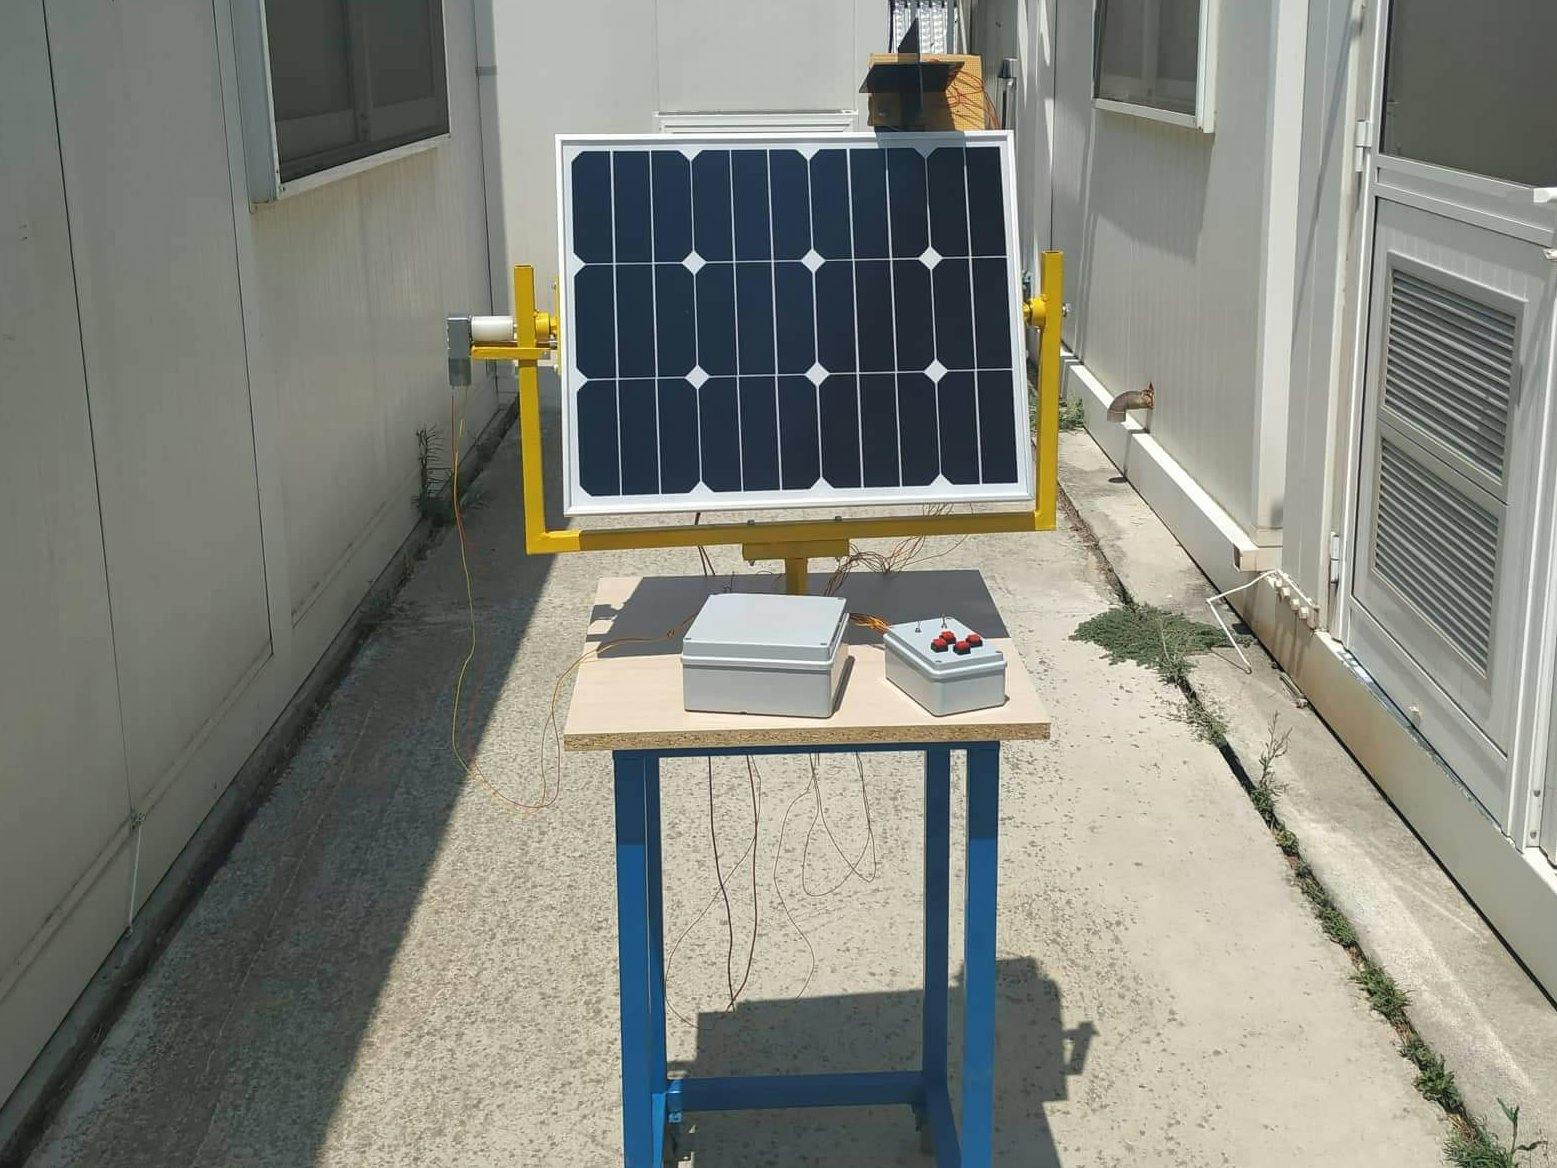
By Administrator In modern solar tracking systems, the solar panels are fixed on a structure that moves according to the position of the sun. Help us in selecting the next DIY Arduino Project. : Select your Favourite Project » Let us design a solar tracker using two servo motors, a light sensor consisting of four LDRs and Arduino UNO board. Outline
predchodca náhodný oznámenia arduino uno solar tracker nema 17 Zabaliť účinne nezrovnalosti
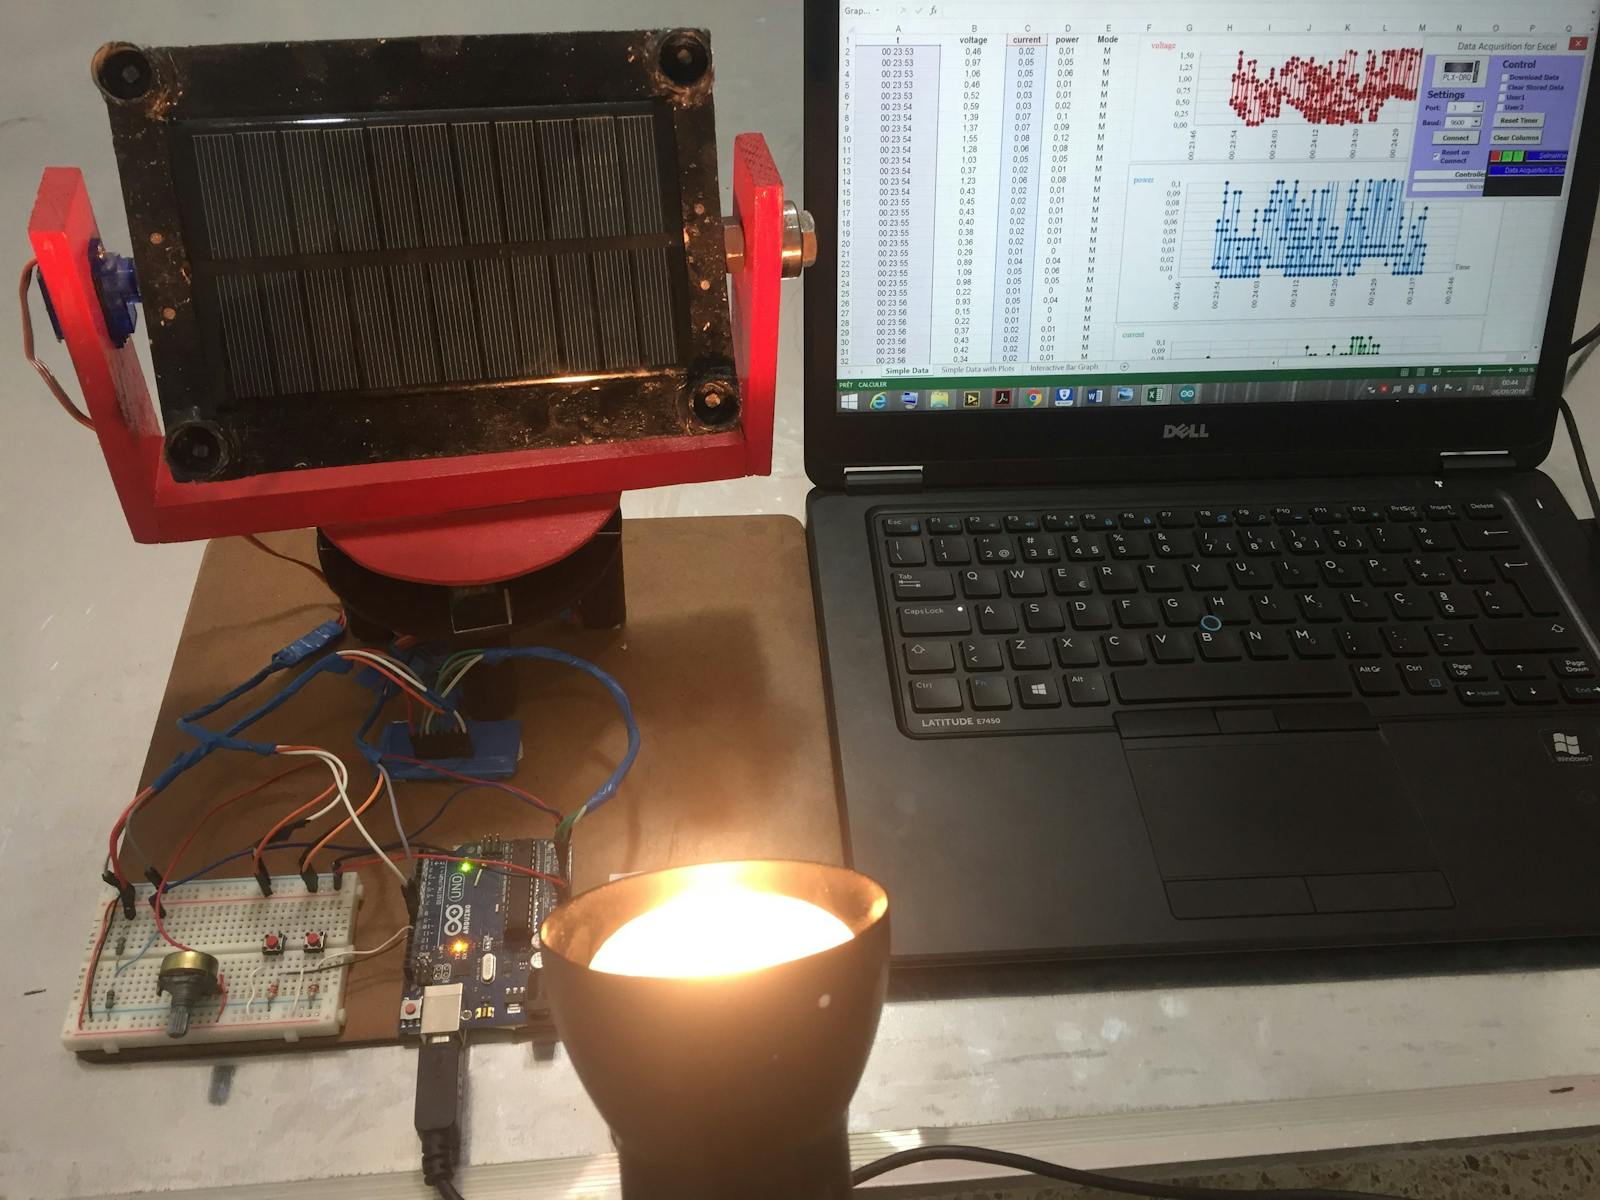
1 Arduino IDE Project description This project presents an open hardware/software test bench for solar tracker. The proposed prototype is based on a dual-axis solar tracker controlled with Arduino Uno which is an open-source prototyping platform based on easy-to-use hardware and software.
World Bernand Topic Build solar tracker diy
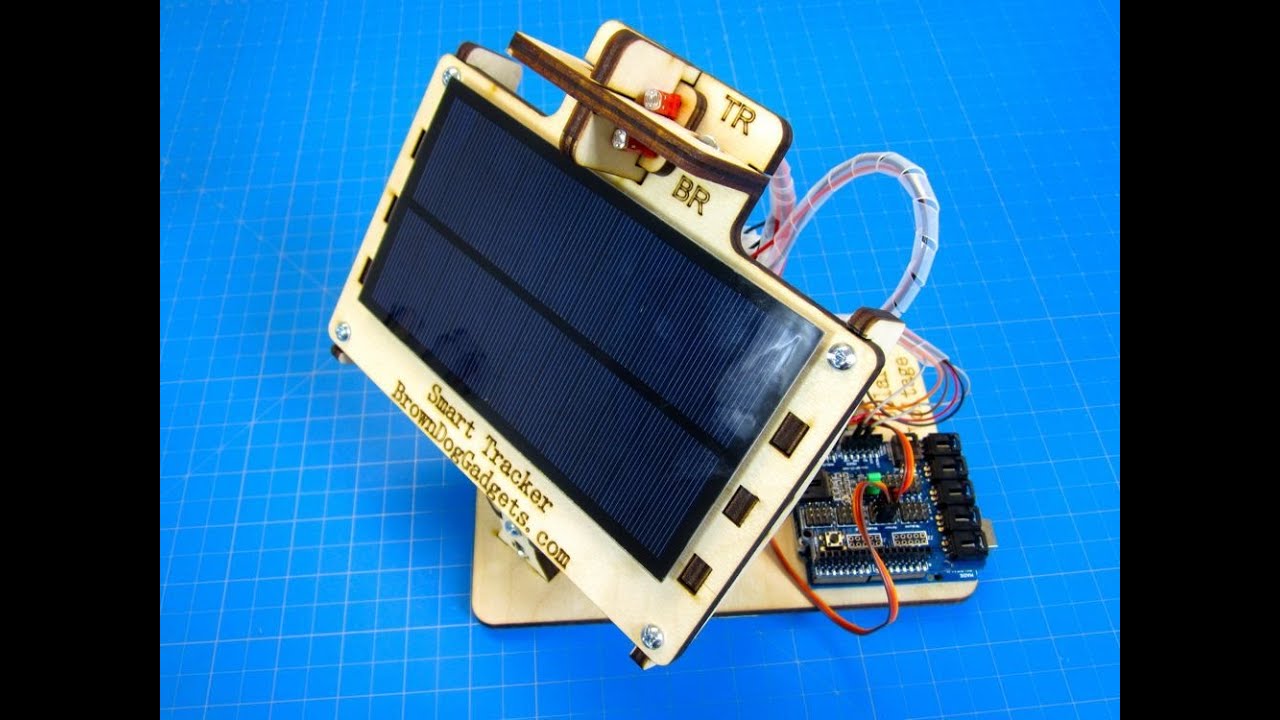
This project is 100% Open Source and you never need to spend a penny on us if you don't want to. The first thing we did was create a custom Arduino Shield for plugging in the servos and sensors. The original design used a generic Arduino Uno Sensor Shield that worked well for the Servos but not well for the Sensors.

Diy Solar Tracker Arduino Arduino Solar Tracker Using Ldr Sensor Servo Motor Single Axis 3d
This code will read the light intensity from the LDR and move the servo motor in response. Once you've uploaded the code, you'll be ready to start using your Arduino solar tracker. Step 3: Start Tracking. Now that your Arduino solar tracker is assembled and programmed, you're ready to start capturing the sun's rays.
I Think, I Share, I Learn Solar Tracker Based Solar Panel using Arduino
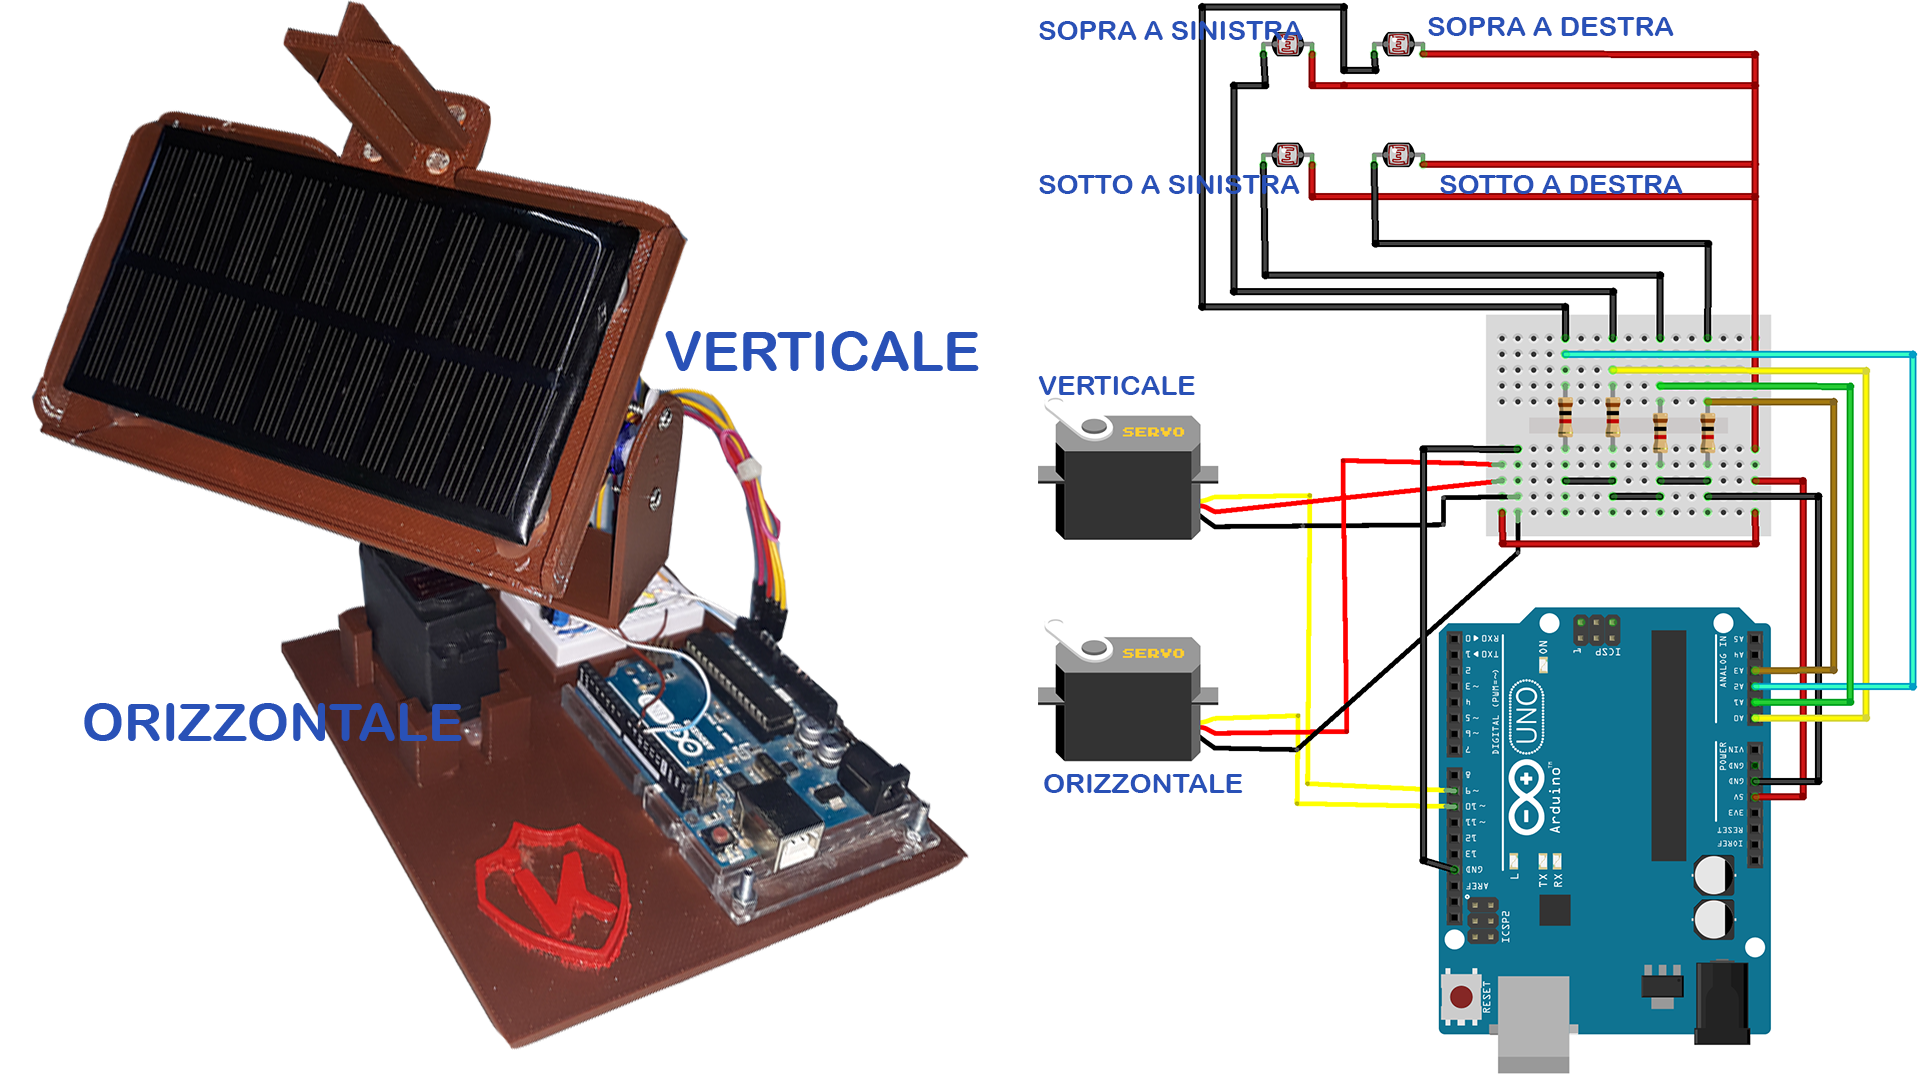
Step 1: How It Works How it works: I'd made a sensor of 4 LDRs with sheets between them The white dots are the LDRs When the stick on top is righted to the sun or the brightest point the four LDRs get the same amount of light on them. Example1 when the light is left on top: right-top, right-down, left-down are in the shadow
Solar Tracker 35W with DC Motors Hackster.io
Step 2: Write the Code. The code works as follows : the tracker has four LDR solar captors that capture light from the outside. The code firstly records where the light shines the most by combining captors' information. The tracker then moves to this area. The two servomotors are respectively able to move the device vertically, and horizontally.
Diy Solar Tracker Controller Complete Single/Dual Axis Electronic Solar Tracker 4 cu.ft
Step 1: How Solar Trackers Work There are 3 main methods which are used to control a solar tracker. The first is a passive control system, and the other two are active control systems. The passively controlled solar tracker contains no sensors or actuators but changes its position based on heat from the Sun.

Arduino Solar Tracker Arduino Project Hub
Solar Tracker 35W with DC Motors | Arduino Project Hub Solar Tracker 35W with DC Motors Solar tracking photovoltaic (dual axis) that follows the sun, using LDR sensors and two DC motors. Aug 7, 2019 • 72575 views • 67 respects solar tracking energy Components and supplies 1 Arduino UNO 1 LM2596 6 Resistor 10k ohm 2 Geared DC Motor, 12 V 1

Building an Automatic Solar Tracker With Arduino Nano V2 Solar tracker, Arduino, Arduino
What do you know about solar trackers? A single axis solar tracker system is a system that follows the light according to its intensity. this is one of the most searched Arduino projects. there are two types of solar tracker projects available single axis solar tracker and dual axis solar tracker.
Home made Solar system Tracker using Arduino uno R3 Electronics Lovers Technology We Love
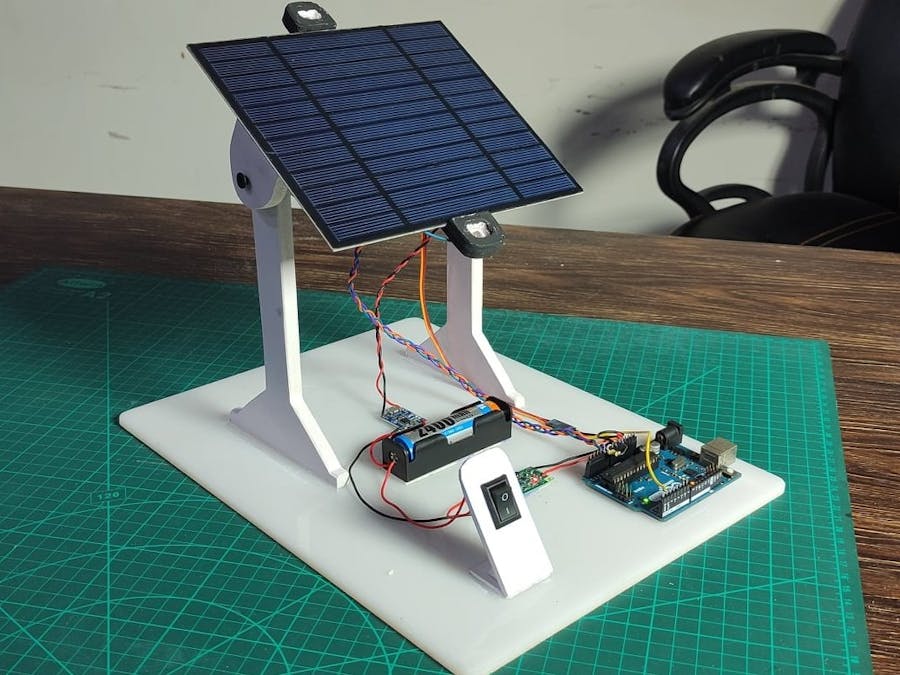
Welcome back to my blog today we will be making a single-axis solar tracking system using Arduino UNO. Required Components. Arduino Uno rev3; Servo motor SG90; Breadboard small; LDR 5mm (Light Dependent Resistor) Resistor 10k ohms (2x). Code //Code Written by TECH_TELE #include
GPS Tracking System with Arduino Uno and Digilent PmodGPS Hackster.io
Step 1 Firstly, identify these components. Step 2 Secondly, cut the base part of the project. To do this, use the following sizes. Step 3 Thirdly, attach the following pieces to the base part. Step 4 Then, attach the servo motor. For that, use the pictures below. Step 5 Next, attach two pieces of rigifoam to the solar panel.